How to Set Up a Shopify Store for a Small Business: Step-by-Step Guide

- Shopify for Small Business: Ultimate Guide to Setup, Pricing & Growth
- Must-Have Shopify Apps for Small Businesses - Reviews & Use Cases
- Using Shopify POS for Small Business - Local Pickup, Inventory & In-Store Sales
- How to Drive Traffic from Referrals and Communities - Partnerships, UGC & PR for Shopify SMBs
- Shopify for Services - Bookings, Subscriptions, and Non-Inventory Sales for SMBs
- Shopify SEO for Small Business - Keyword Mapping, On-Page & Technical Tips
- How to Set Up a Shopify Store for a Small Business: Step-by-Step Guide
- Shopify Pricing for Small Businesses: Plans, Fees & Real Total Costs
Get In Touch
Shopify has come a long way since its launch in 2006, when it started as a simple online solution for selling snowboard equipment. Over the years, it has transformed into a powerful, cloud-based eCommerce platform that empowers millions of entrepreneurs to build and scale their online stores with ease.
Today, Shopify drives a global network of businesses, contributing to more than $700 billion in total sales – a clear reflection of how far digital commerce has come. For small businesses, this platform isn’t just about selling products online; it’s about welcoming new opportunities, reaching customers worldwide, and turning ideas into income.
This step-by-step guide will help you set up your own Shopify store from scratch and position your brand for sustained growth.
How to Set Up A Shopify Store In 12 Steps
Building your Shopify store might sound technical, but it’s actually a smooth process once you know the right steps. In this section, we’ll walk you through 12 simple stages that take you from signing up to launching your first live store – clear, actionable, and made for small business owners ready to grow online.
1. Create Your Shopify Account
Begin by heading to Shopify’s website and clicking on the Start free trial button.

Shopify will prompt you with a few questions about your store and what you’re planning to sell – either answer them based on your business or skip ahead. Next, set up your account details by providing your email, creating a secure password, and choosing your unique store name.
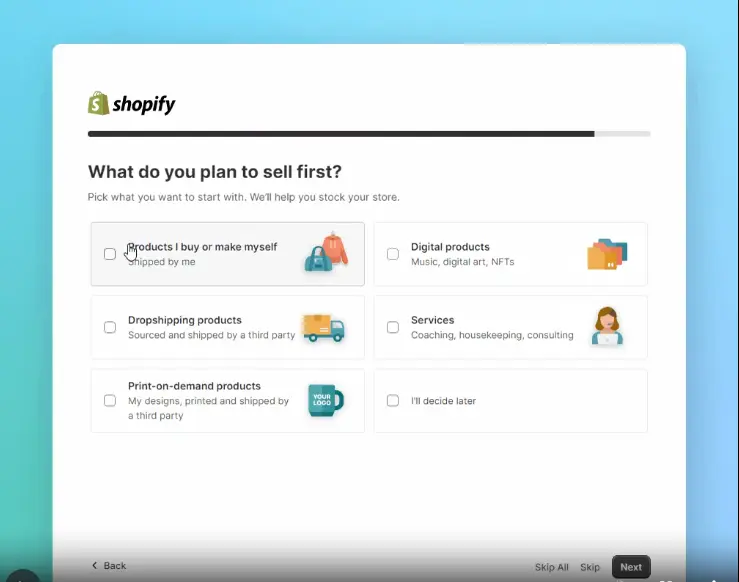
Once you complete these steps, you’ll land in your Shopify admin dashboard, ready to begin your four-day free trial with full access to store features.
If you have trouble signing up or don’t receive the confirmation email, try checking your spam folder or using a different browser. Shopify Support is also available if issues persist.
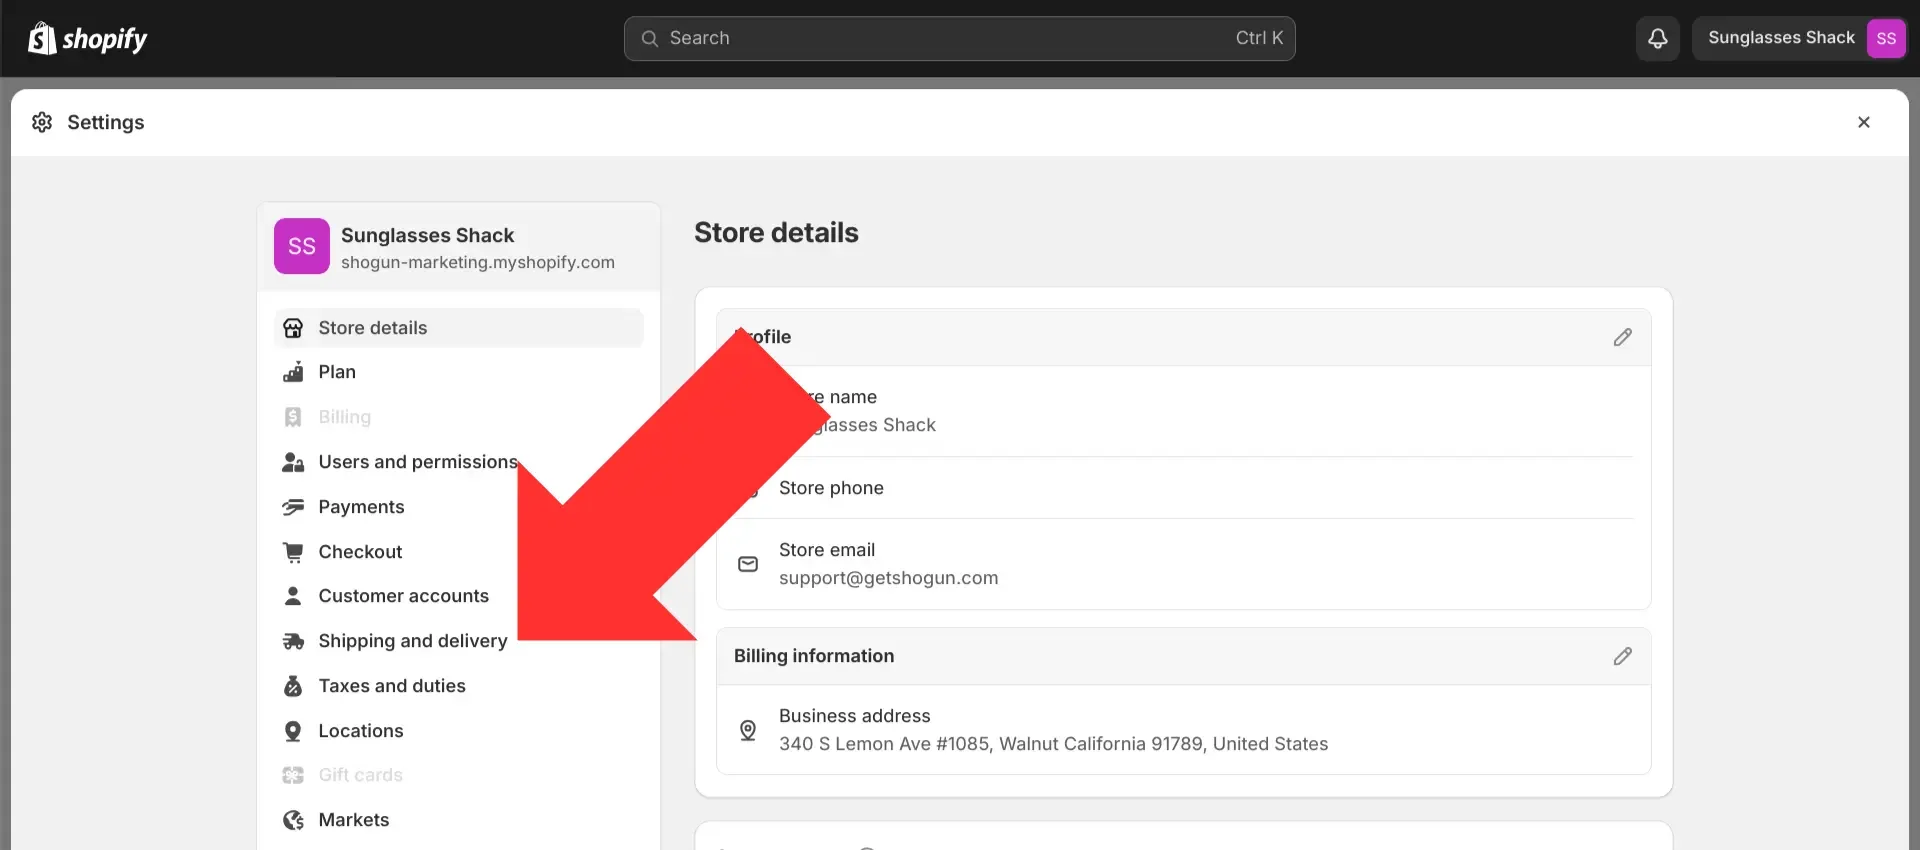
2. Explore the Shopify Admin Panel
The admin panel is packed with features that allow you to run your online business smoothly. Spend time navigating this space since understanding it well will save you headaches down the line.
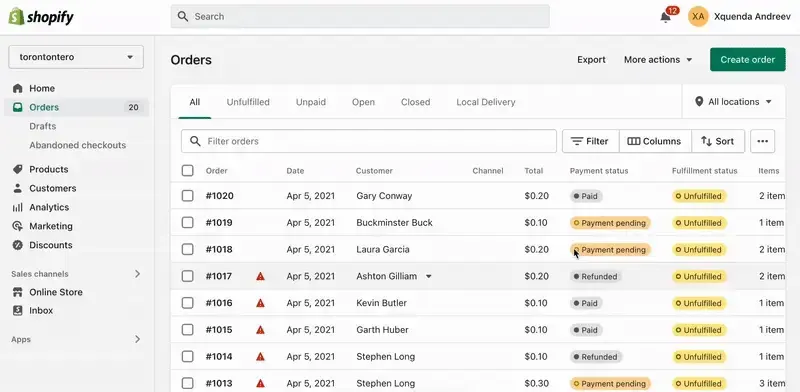
Some key sections include:
- Orders: Track new sales, process returns, handle cancellations, and update order status.
- Products: Add new items, update inventory counts, upload images, and optimize descriptions.
- Customers: Maintain detailed records, manage mailing lists, and export customer data as required.
- Content: Publish pages and blog posts to engage visitors and boost SEO.
- Finances: Monitor revenue, expenses, fees, and profits effortlessly.
- Analytics: Access visual reports on sales trends, popular products, and customer behavior.
- Marketing: Launch campaigns via email, social media, and automated reminders like cart abandonment.
- Discounts: Create varied discount codes and decide when they apply.
- Apps: Install additional tools to extend your store’s capabilities, from reviews to inventory alerts.
Becoming comfortable with this dashboard will serve as the foundation for running your store confidently.
3. Choose and Customize Your Store’s Theme
Your store’s appearance is crucial for making a strong first impression. Shopify offers a default theme, but you can pick from dozens of others to match your brand’s personality.
To create a visually appealing online experience, you can collaborate with a Shopify design expert who can ensure your theme aligns with your brand identity.
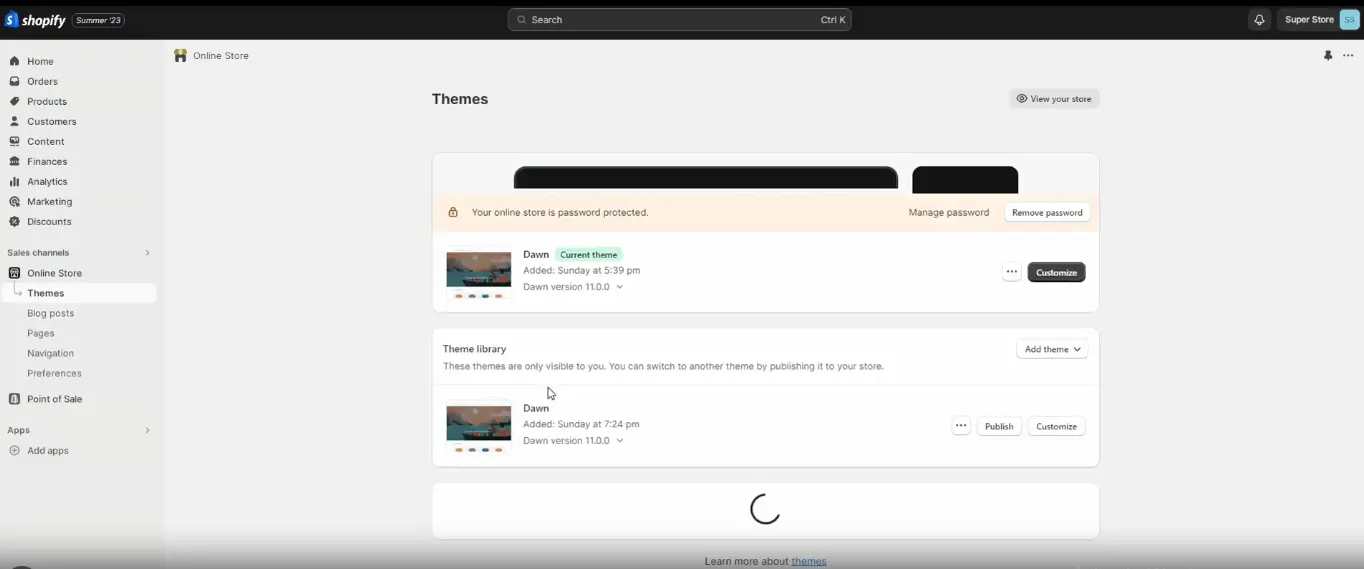
To change themes:
- Navigate to Online Store > Themes
- Browse free options under “Popular free themes” or visit the full Shopify Theme Store
- Preview themes to see how they display your products and store layout
- Click Add to install your chosen theme to your Theme Library
- Customize your theme’s colors, typography, header, footer, and homepage sections visually or through simple settings
A polished, cohesive look reflects professionalism and encourages trust.
If your theme looks off on mobile or loads slowly, preview it on various devices before publishing. Choosing fast, responsive themes ensures a better user experience.
4. Organize Navigation for Seamless Shopping
Intuitive navigation helps customers find what they want quickly, reducing frustration and cart abandonment.
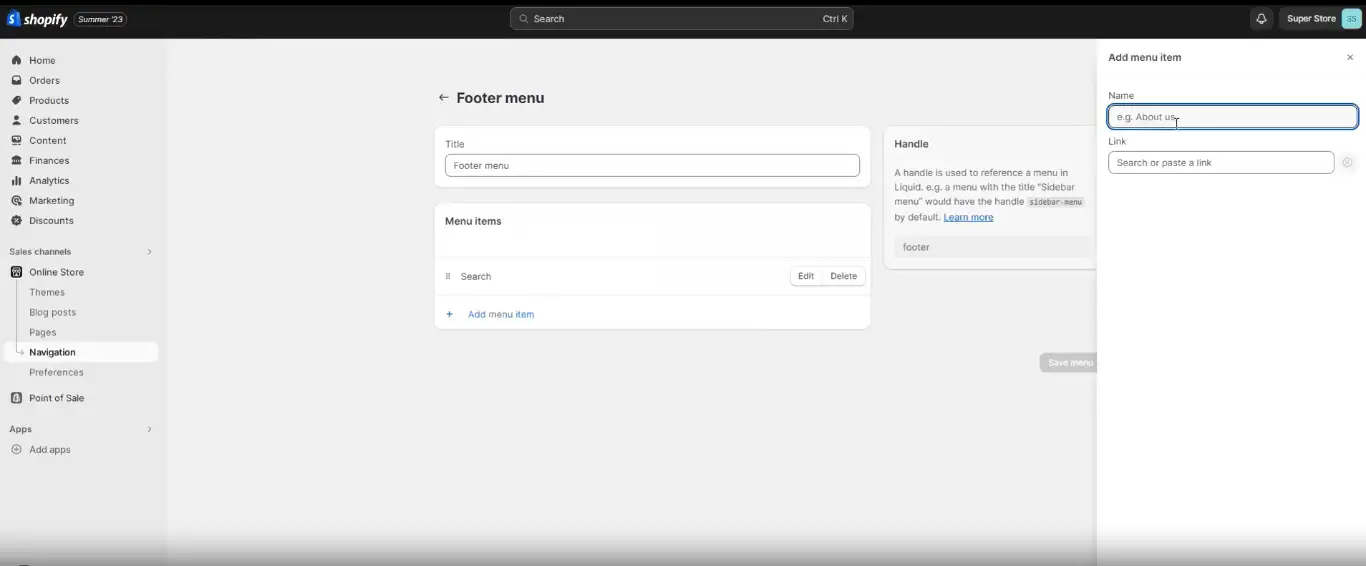
In Online Store > Navigation, you can:
- Create main menus with links to collections, product categories, or important pages
- Build footer menus with contact information, policies, and additional resources
- Add nested menus (drop-downs) to group related items and improve browsing flow
Well-planned navigation invites exploration and makes your site easier to use on desktops and mobiles alike.
Sometimes menus may link incorrectly, or pages may not show up. Double-check that all menu links point to the right pages and clear your browser cache to see updates.
If you need professional help structuring user-friendly menus and site architecture, consider a UI UX optimization service.
5. Add Products and Product Descriptions
The heart of your store is its product catalog. Take the time to provide clear, attractive listings that inform and persuade shoppers.

To manage products:
- Go to Products > Add product to enter names, descriptions, categories, prices, and shipping info
- Upload crisp, well-lit photos from multiple angles to help customers visualize the product
- Use tags and collections to organize products for better filtering and search
- Optimize each product’s SEO listing by editing the search engine preview with custom titles and descriptions or let eCommerce SEO experts handle optimization for higher visibility.
- Duplicate products for variations to save time (e.g., sizes, colors)
- Regularly update stock levels to avoid overselling or disappointments
Well-crafted product pages increase conversions and improve customer satisfaction.
If product images don’t upload or stock counts seem off, check file formats and sizes. Also, ensure inventory numbers are accurate across all variants.
6. Configure Payments and Checkout Settings
Ensuring your store accepts payments securely and smoothly is a cornerstone of a successful online business. Shopify Payments simplifies this process by acting as the default payment gateway for many regions, accepting major credit cards and alternative payment methods without needing third-party setup.
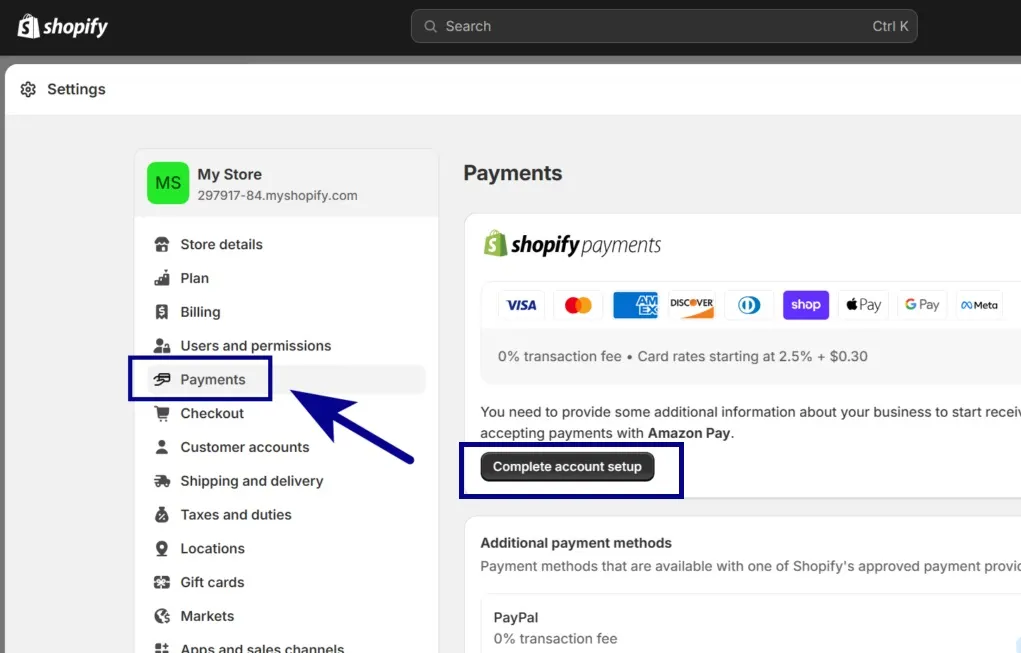
To begin, confirm your eligibility for Shopify Payments based on your location. Once verified, activate it under Settings > Payments and carefully fill in your business and banking information to facilitate seamless transactions and timely payouts.
Shopify also recommends enabling two-step authentication on your account to add an extra layer of protection against unauthorized access.
After setting up Shopify Payments, visit the Checkout section under Settings to tailor your payment and shipping preferences. Here, you can configure:
- Whether customers create accounts or check out as guests
- Customized checkout interface options and language settings to match your brand
- Shipping and delivery preferences aligned with your store policies
- Tax and currency display options that fit your target market
Finally, it’s wise to run a trial transaction using Shopify’s test mode. This simulates a purchase with test credit card numbers, allowing you to validate that payment processing is operational without processing real charges. Completing this step helps prevent glitches or payment hiccups when customers place real orders.
If Shopify Payments isn’t available in your country or if you have trouble accepting payments, you can easily set up other trusted options like Stripe or PayPal. These gateways are secure, widely used, and straightforward to activate within your Shopify settings, ensuring your customers have multiple ways to pay without issues.
Explore the strengths of Shopify Payments and Stripe to find the perfect fit – click here to optimize your store’s checkout today!
7. Create Essential Web Pages
Besides products, your store needs informative pages to support your brand story, build trust, and provide important information.
Create pages like:
- About Us: Share your mission, values, and story to connect emotionally.
- Contact: Provide contact forms, email, and phone info.
- FAQ: Answer common questions proactively.
- Policies: Display shipping, returns, privacy, and terms of service clearly.
Add these pages by going to Online Store > Pages, and make sure to link them within your navigation menus so visitors can easily access them.
8. Set up Shipping Rates Thoughtfully
A clear and fair shipping policy can influence buying decisions decisively.
Set shipping rates by navigating to Settings > Shipping and Delivery:
- Create shipping profiles for different product groups if needed
- Set flat rates, free shipping thresholds, or calculated rates based on weight or price
- Customize shipping options by region – local, national, or international
- Incorporate carrier-calculated shipping for real-time pricing
- Periodically revisit and adjust rates to stay competitive and cost-effective
Shipping setup helps prevent surprises at checkout and provides transparency to customers.
If shipping costs don’t appear at checkout, verify your shipping profiles and rules. Assign products properly to shipping profiles for accurate calculation.
9. Manage Tax Settings Accurately
Tax collection varies by region and product type, so it’s essential to configure your store correctly to remain compliant.
In Settings > Taxes and Duties:
- Specify your store’s location and the regions where you collect taxes
- Enter tax registration numbers, such as VAT or GST, if applicable
- Enable automatic tax calculations or adjust rates manually
- Set tax overrides for specific products or customers if needed
Consult a local tax expert to ensure your settings align with regulations in your markets.
Incorrect tax calculations often come from misconfigured regional settings or missing tax IDs. Review your tax setup carefully and consult experts if needed.
Launch Your Shopify Store the Right Way
Get expert help from WebyKing to set up, design, and optimize your Shopify store — so you can go live faster and sell smarter.
10. Connect or Purchase Your Domain
Having your own domain name (e.g., yourbusiness.com) adds credibility and makes your store easier to find.
You can buy a new domain directly inside Shopify by going to Settings > Domains and searching for your preferred name. Shopify will handle setup automatically.
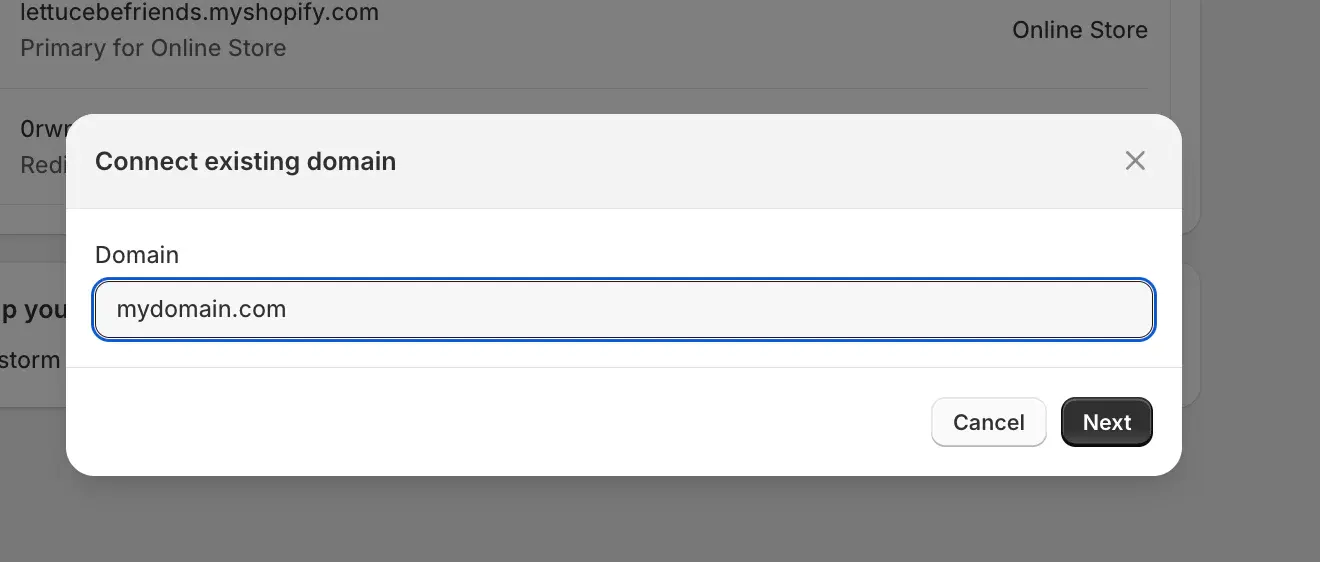
- If you already own a domain from another provider, you can connect it by entering your domain name in Shopify’s Domains section and then updating your domain’s DNS records (like A record and CNAME) through your domain provider’s website.
Once connected and verified, your domain will appear as your primary site address. Domain verification can take up to 48 hours, so plan accordingly.
11. Conduct Thorough Store Testing
Before going live, make sure everything runs like clockwork by performing test purchases:
- Enable Test Mode in payment settings to avoid actual charges
- Add products to your cart, go through checkout, and use Shopify’s test card numbers
- Verify payment processing, shipping options, order confirmation emails, and stock updates
- Address any glitches or confusing points in the user journey
Testing builds confidence to open your store to real customers without surprises.
If test orders fail or confirmation emails don’t arrive, check you’re in test mode correctly, and verify your store’s email notification settings.
12. Remove Password Protection and Launch
When you’re ready to go live, log in to your Shopify admin and go to Online Store > Preferences. Scroll down to the Password Protection section, uncheck the box that restricts access with a password, and click Save.
That’s it – your store is now live and open for customers to visit and shop! This simple step marks the official launch of your online store, so you can start welcoming visitors and making sales.
Just ensure you save the settings after disabling the password to make your store live without access issues.
Following these steps ensures a strong foundation for an attractive, functional, and successful Shopify store geared for sustainable business growth.
How Long Does It Take To Set Up A Shopify Store?
The development time required to set up a Shopify store varies greatly depending on whether you choose to do it yourself or collaborate with an experienced Shopify development company. While managing the process independently offers flexibility and hands-on control, partnering with seasoned professionals accelerates the setup timeline and delivers a polished, fully optimized store from the start.
This expert guidance can save valuable time, help you avoid common pitfalls, and ensure your online business is ready to perform at its best right away.
| Stage | DIY Timeframe | With an Experienced Shopify Development Agency |
|---|---|---|
| Basic Setup | 4–5 Days | 2–3 Days |
| Product & Page Upload | 6–7 Days | 3–4 Days |
| Theme Customization | 5–9 Days | 2–4 Days |
| App Integrations | 3–5 Days | 1 Day |
| Final Testing & Launch | 1 Day | 1 Day |
This breakdown helps you understand the typical time investment involved at each stage, so you can plan your Shopify store launch more effectively and confidently.
Build. Launch. Grow — All with WebyKing.
From theme customization to SEO and integrations, WebyKing helps small businesses create Shopify stores built for performance and profits.
What Are The Legal Requirements For Setting Up A Shopify Store?
Setting up a Shopify store comes with important legal responsibilities that help protect your business and customers while ensuring compliance with international and local regulations.
These legal requirements cover a broad range of areas – from data privacy and marketing practices to tax obligations and intellectual property protection.
- Website Tracking Compliance: Depending on your location and the markets you serve, you may need to comply with data privacy laws such as the California Consumer Privacy Act (CCPA) or the European Union’s General Data Protection Regulation (GDPR).
- Email Marketing Regulations: Your email marketing efforts must follow laws like the CAN-SPAM Act, which mandates honest and transparent communication with recipients.
- Privacy Policies: If your store collects information from children under 13, compliance with the Children’s Online Privacy Protection Act (COPPA) is necessary to safeguard minors’ data and enforce marketing limits.
- Secure Handling of Financial Data: Ensure that your Shopify store adheres to regulations such as the Electronic Signatures in Global and National Commerce Act (E-Sign Act), which governs the legality of electronic agreements.
- Consumer Protection and Advertising: Abide by the Federal Trade Commission (FTC) Act, which prohibits deceptive advertising and unfair business practices.
- Tax Compliance: Make sure to register with tax authorities where applicable, collect the right amount of tax, remit payments timely, and account for international duties if selling globally.
- Intellectual Property Protection: Safeguard your brand identity and product designs by registering trademarks, copyrights, or patents. This legal protection prevents unauthorized use or duplication and supports your brand’s long-term value.
- Product Restrictions and Shipping Regulations: Be aware of laws governing the sale and shipment of certain products, particularly those with shipping restrictions across borders.
Legal obligations for your Shopify store vary depending on your business location, the types of products you offer, and the audience you serve. Keeping yourself updated and consulting with legal experts is vital to ensure your store operates within applicable laws and regulations.
Set up Your Shopify Store with WebyKing
WebyKing is your all-in-one solution for launching a stunning Shopify store that truly represents your brand. From crafting custom themes to seamless app integration, marketing, and SEO, their expert team ensures your store looks professional and functions flawlessly.
Trust WebyKing to handle the technical details so you can focus on growing your business and achieving your eCommerce goals with confidence.
Ready to boost your online presence and convert visitors into loyal customers? Partner with WebyKing and turn your Shopify store dreams into a thriving reality today.
Frequently Asked Questions (FAQs):
How long does it typically take to set up a Shopify store?
Setting up a basic Shopify store usually takes about 1 to 2 weeks, depending on your familiarity with the platform and the complexity of your products and theme. More customized stores with advanced features can take several weeks longer.
What are the main costs involved in starting a Shopify store?
Costs include Shopify’s monthly subscription plans, starting from the Basic plan at $39/month to Shopify Plus at higher tiers. Additional expenses may arise from purchasing premium themes, third-party app subscriptions, custom domains (around $11/year), and payment processing fees.
How do I add products to my Shopify store?
Within your Shopify admin dashboard, navigate to ‘Products’ and click ‘Add product’. You can then enter a product title, detailed description, upload images, set prices, and manage inventory.
What payment methods can I offer on Shopify?
Shopify supports a broad range of payment gateways including Shopify Payments (which accepts major credit cards), PayPal, Stripe, Authorize.net, and Amazon Pay. For international sales, Shopify also integrates with many local payment options to broaden your customer reach.
Can I use my own custom domain?
Yes, you can either purchase a new domain directly through Shopify or connect an existing domain purchased elsewhere by updating its DNS settings.
Why is testing my Shopify store before launch important?
Testing ensures all features from navigation to checkout operate seamlessly and securely. Utilize Shopify’s test mode to simulate purchases without real transactions.